
4 posts tagged with "discord"

View All Tags

· 4 min read

Intended originally for gamers, Discord has evolved into a popular platform for online communities. The versatility of Discord lies in its bots - automated programs that interact with users and add functionality, improving the user experience. From tracking games and assigning roles to playing music and more, Discord bots bring unique utility to the digital world.

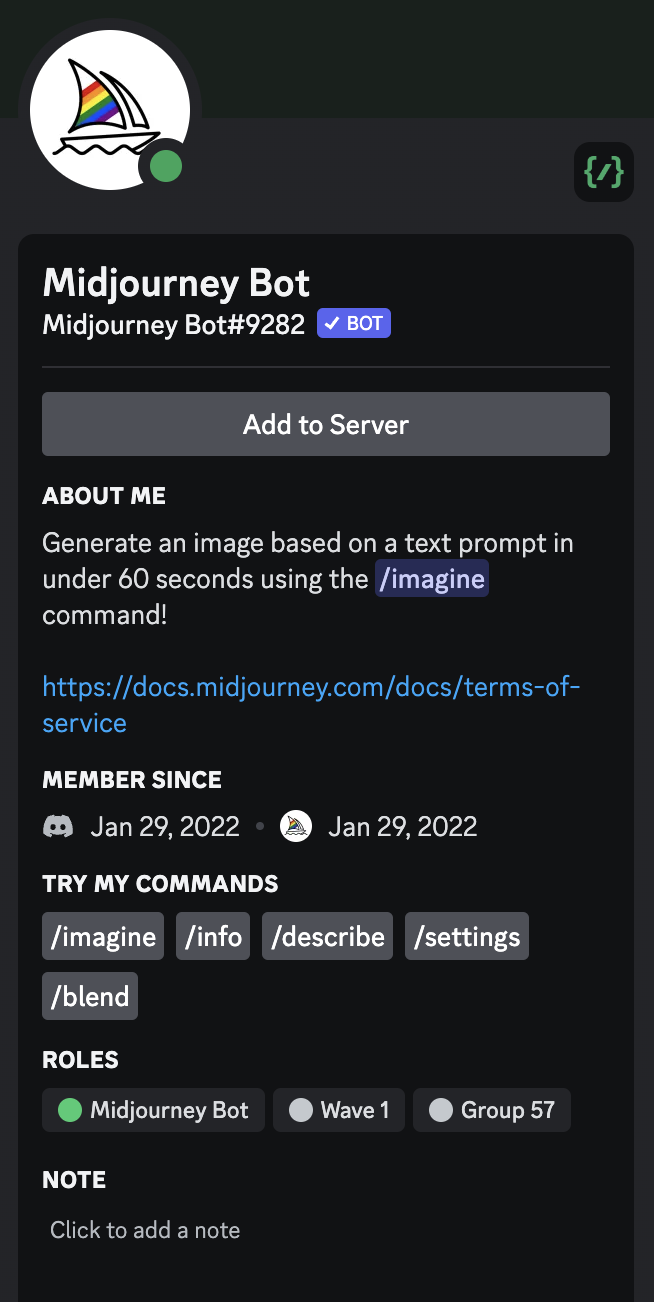
Today, some companies essentially run their entire business on Discord using bots - Midjourney is a prime example. Midjourney's AI art bot handles all of its operations through Discord, allowing users to generate images via text prompts. Having an appealing profile helps your bots stand out and attract more users, just like Midjourney's.

Why Optimize Your Discord Bot's Profile

Optimizing a Discord bot's profile is like polishing a diamond. As developers, we invest time and effort into designing and programming these bots to perform specific tasks. However, presentation is just as critical as functionality. An optimized profile not only improves the user experience but also enhances the bot's credibility and effectiveness.

With an optimized profile, your bot maintains a consistent identity, becoming easily recognizable to users. It also clearly conveys the bot's purpose and capabilities, reducing confusion. Additionally, an appealing and professional profile can increase server engagement.

Optimizing isn't merely about aesthetics and user engagement, either. From a technical standpoint, optimized bots can use server resources more efficiently, reducing lag and latency. By refining your bot's code and permissions, you ensure that your bot carries out its functions smoothly and without error, contributing positively to the overall health of your server.

In this article, I will show you several ways to make your Discord bot profile attractive.

Add an Icon, Description, and Tags for your Discord bot

An icon and clear description can help users understand what your Discord bot does.

To add the above information, you can simply go to the Discord Developer Portal and click your bot icon. Then you will be redirected to the bot details pages.

Click the General Information tab on the left, you can upload an icon, edit the description, and write some tags for your Discord bot. Before you leave this page, make sure you have saved the changes.

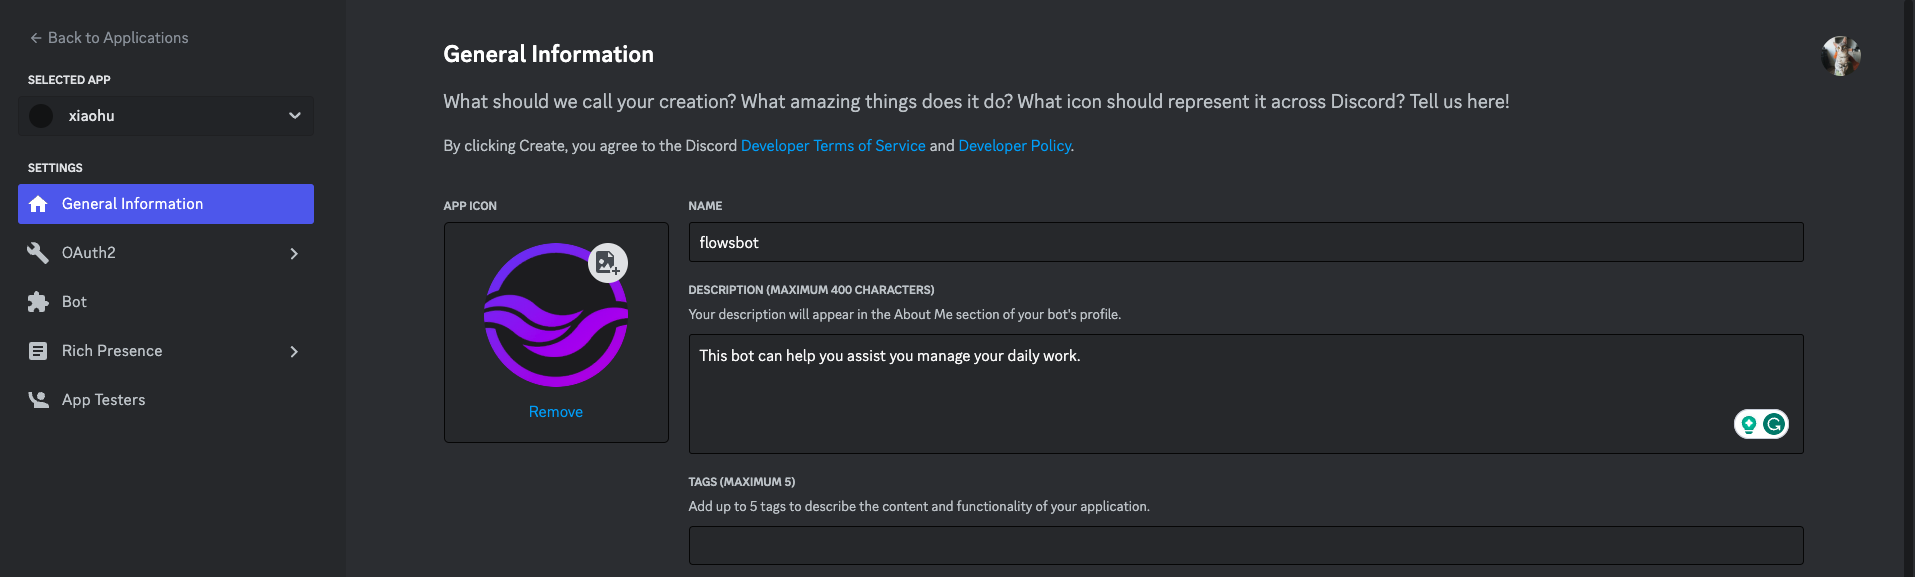
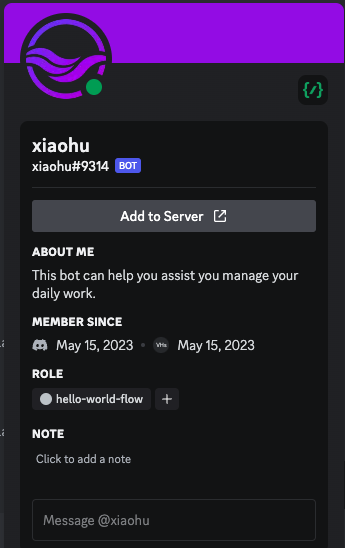
With a good icon, description, and tags, your bot's purpose will be clear on its profile.

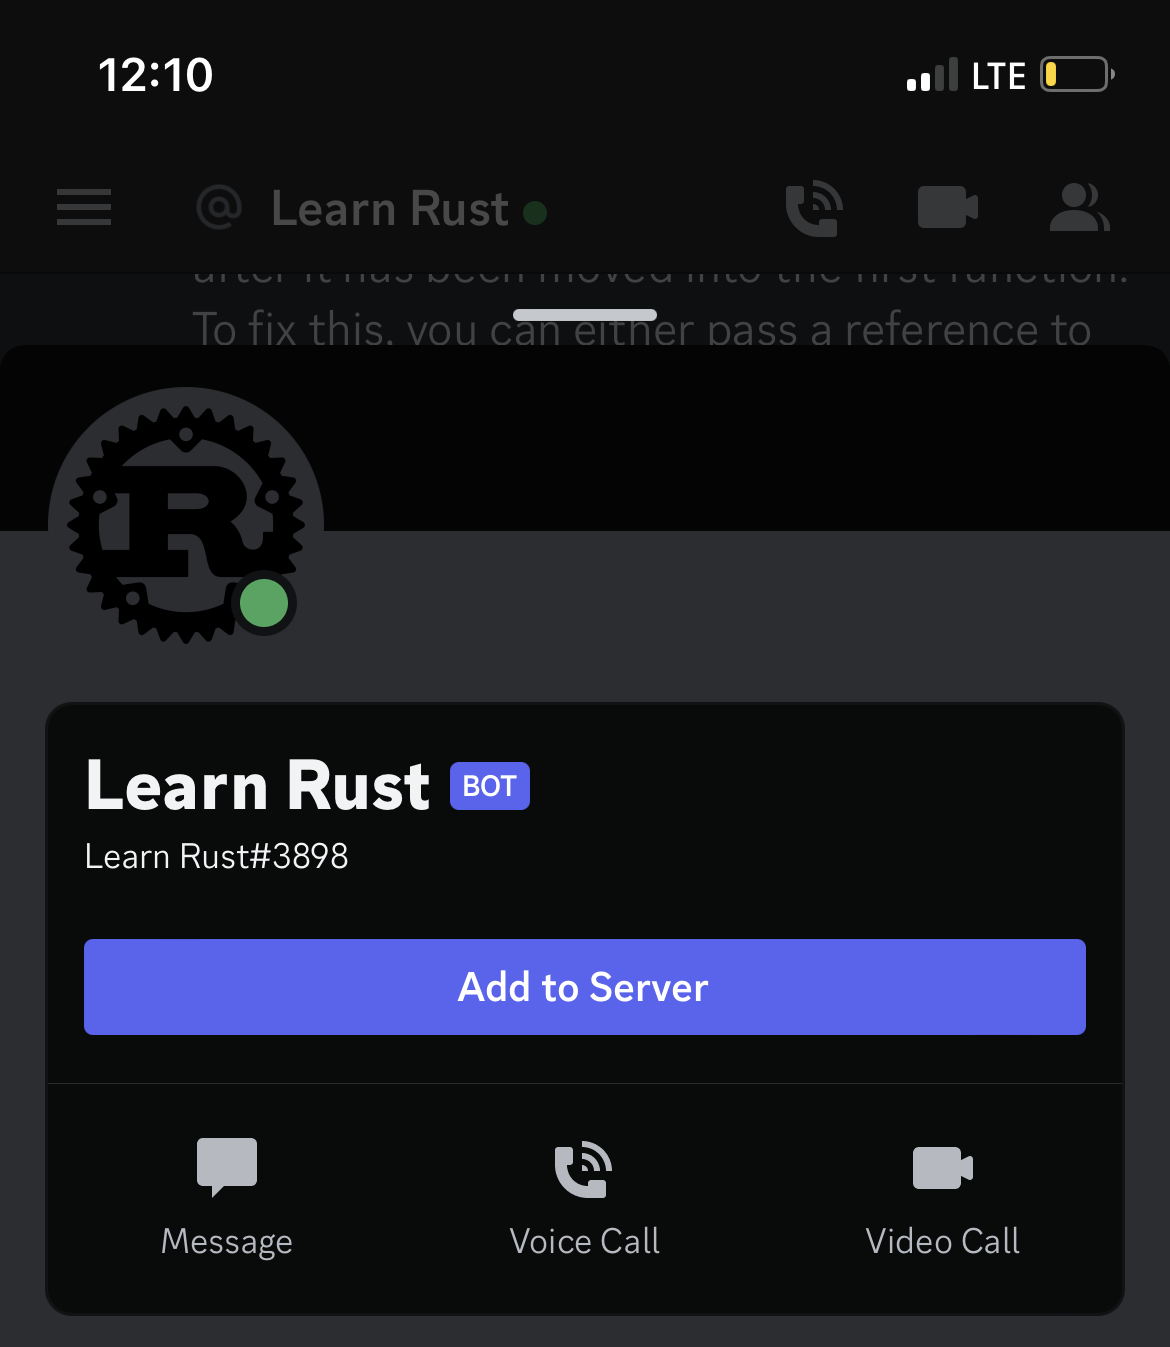
Get an "Add to Server" Button

If your Discord bot is public, like Midjourney, you may want others to be able to add it to their servers. You can add an "Add to Server" button to your bot's profile. You can customize the link it points to, like your bot's invite link or a landing page.

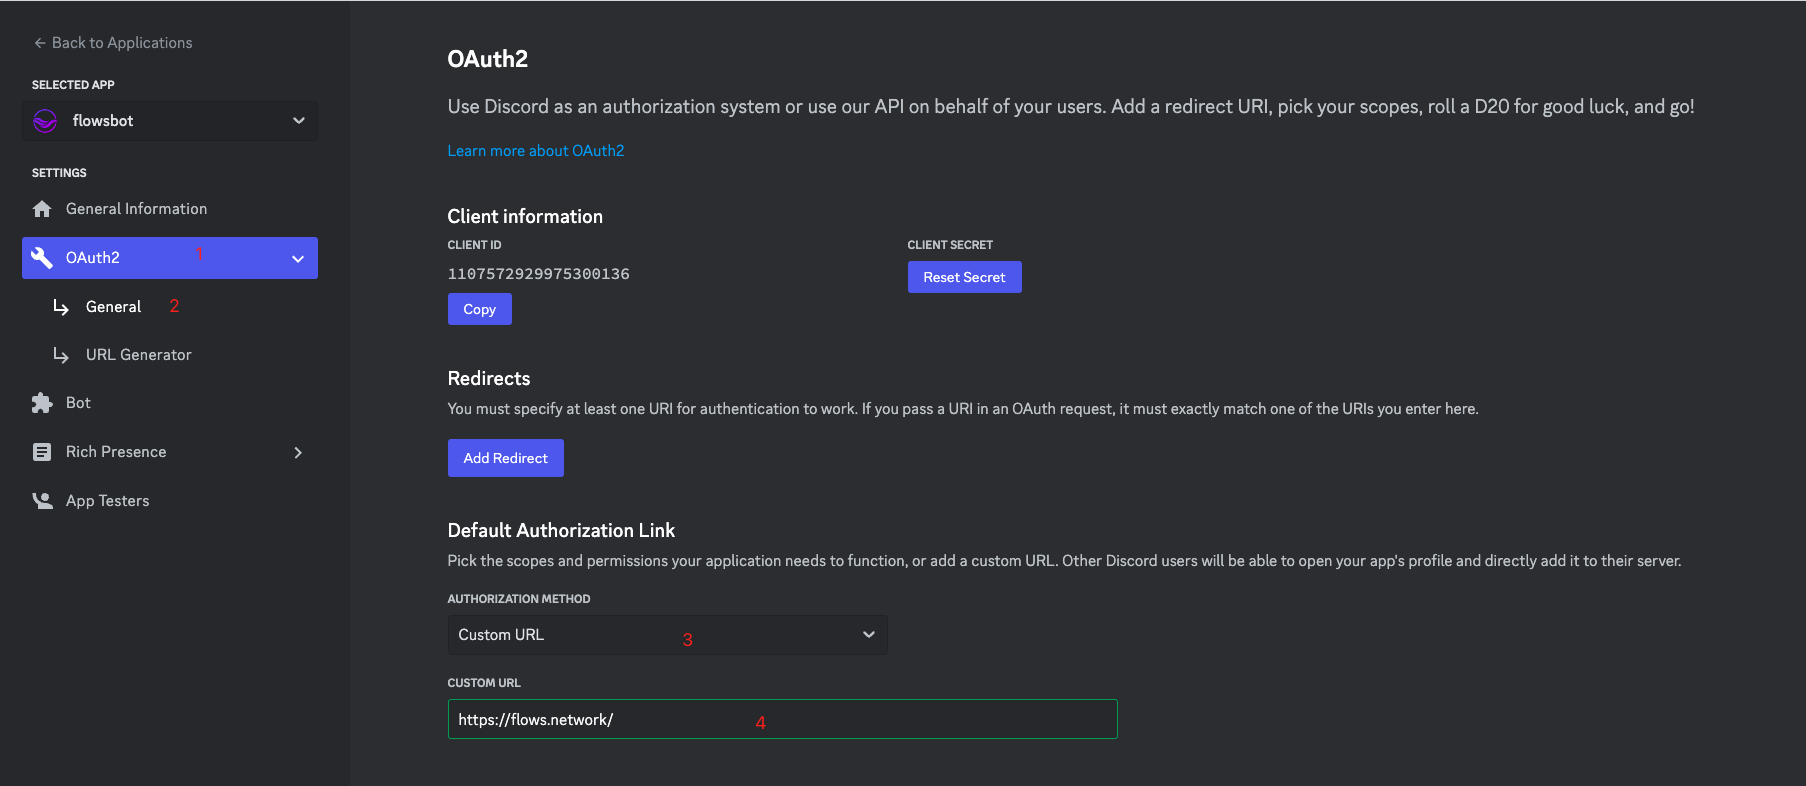
To add this feature, we still need to go to the Discord Developer portal and enter the bot detail page.

  • Click on the OAuth2 tab on the right
  • Click on the General tab on the right
  • Go to find the Default Authorization Link and choose Custom URL
  • Add your URL in the box
  • Save the changes before you leave.

Please note that your bot must be public to activate this feature.

List the Top 5 Slash Commands on your Discord Profile

Discord recently released a new feature “Try my commands” to list the top 5 used slash commands of your Discord bot, which can help user onboard your bot quickly.

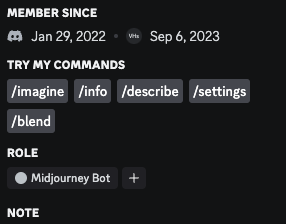
However this feature is only open to verified Discord bots. To be verified, your bot must be in over 75 servers. Once verified, if your bot has at least one global slash command, its top 5 most used slash commands will automatically appear in the "Try My Commands" section.

There are many other tips to optimize your Discord bot. We'll continue adding to this article, so stay tuned.

Flows.network is a serverless platform for developing, building, and hosting Discord bots that connect to external web services and other SaaS tools.

Here are some tutorials for you to get started:

· 5 min read

Flows.network is a serverless platform that allows you to build and deploy LLM applications without worrying about infrastructure management. In this guide, we will walk you through the process of building a ChatGPT Discord bot using flows.network, step-by-step. More importantly, you don’t need to master any coding skills.

This bot can

  • Customizable prompts - You can copy and paste any prompt for the bot to respond to. Feel free to get creative!
  • Direct message responses - Have a private conversation with the bot by direct messaging it.
  • Channel message responses - The bot can respond to messages posted in channels, allowing all channel members to interact with it.
  • External service integration - Services like OCR can be integrated to expand the bot's functionality. For example, the bot can process images with OCR.

1. Get a Discord Bot Token

To get started, you need to have a Discord account. And then follow these steps:

You can also refer to How to create a Discord chat bot for more information.

1.1 Create a New Application

  • Visit the Discord Developer Portal and log in with your Discord account.
  • Click on "New Application" and provide a name for your bot.
  • Navigate to the "Bot" tab and click on "Add Bot."

1.2 Obtain Bot Token

  • Go back to the "Bot" tab and click on "Copy" under the "TOKEN" section. Keep this token secure as it will be used to authenticate your bot.
  • Turn on the "PRESENCE INTENT", "SERVER MEMBERS INTENT", and "MESSAGE CONTENT INTENT" settings.

1.3 Add a Bot to Your Application

  • Under the "OAuth2" tab, select the "bot" scope.
  • Scroll down and select the required bot permissions based on your bot's functionality.
  • Copy the generated bot invite URL and invite the bot to your server. You can see your bot is offline.

2. Set up a flows.network Account

Now that you have set up your Discord bot account, let's set up a flows.network account.

  • Visit the flows.network website and sign up for a new account with your GitHub account.

3. Create the Discord ChatGPT Bot on flows.network

All the preparations are ready. Let’s create a Discord ChatGPT bot from a template.

3.1 Load the ChatGPT Discord Bot template

Click here to load the ChatGPT Discord bot template.

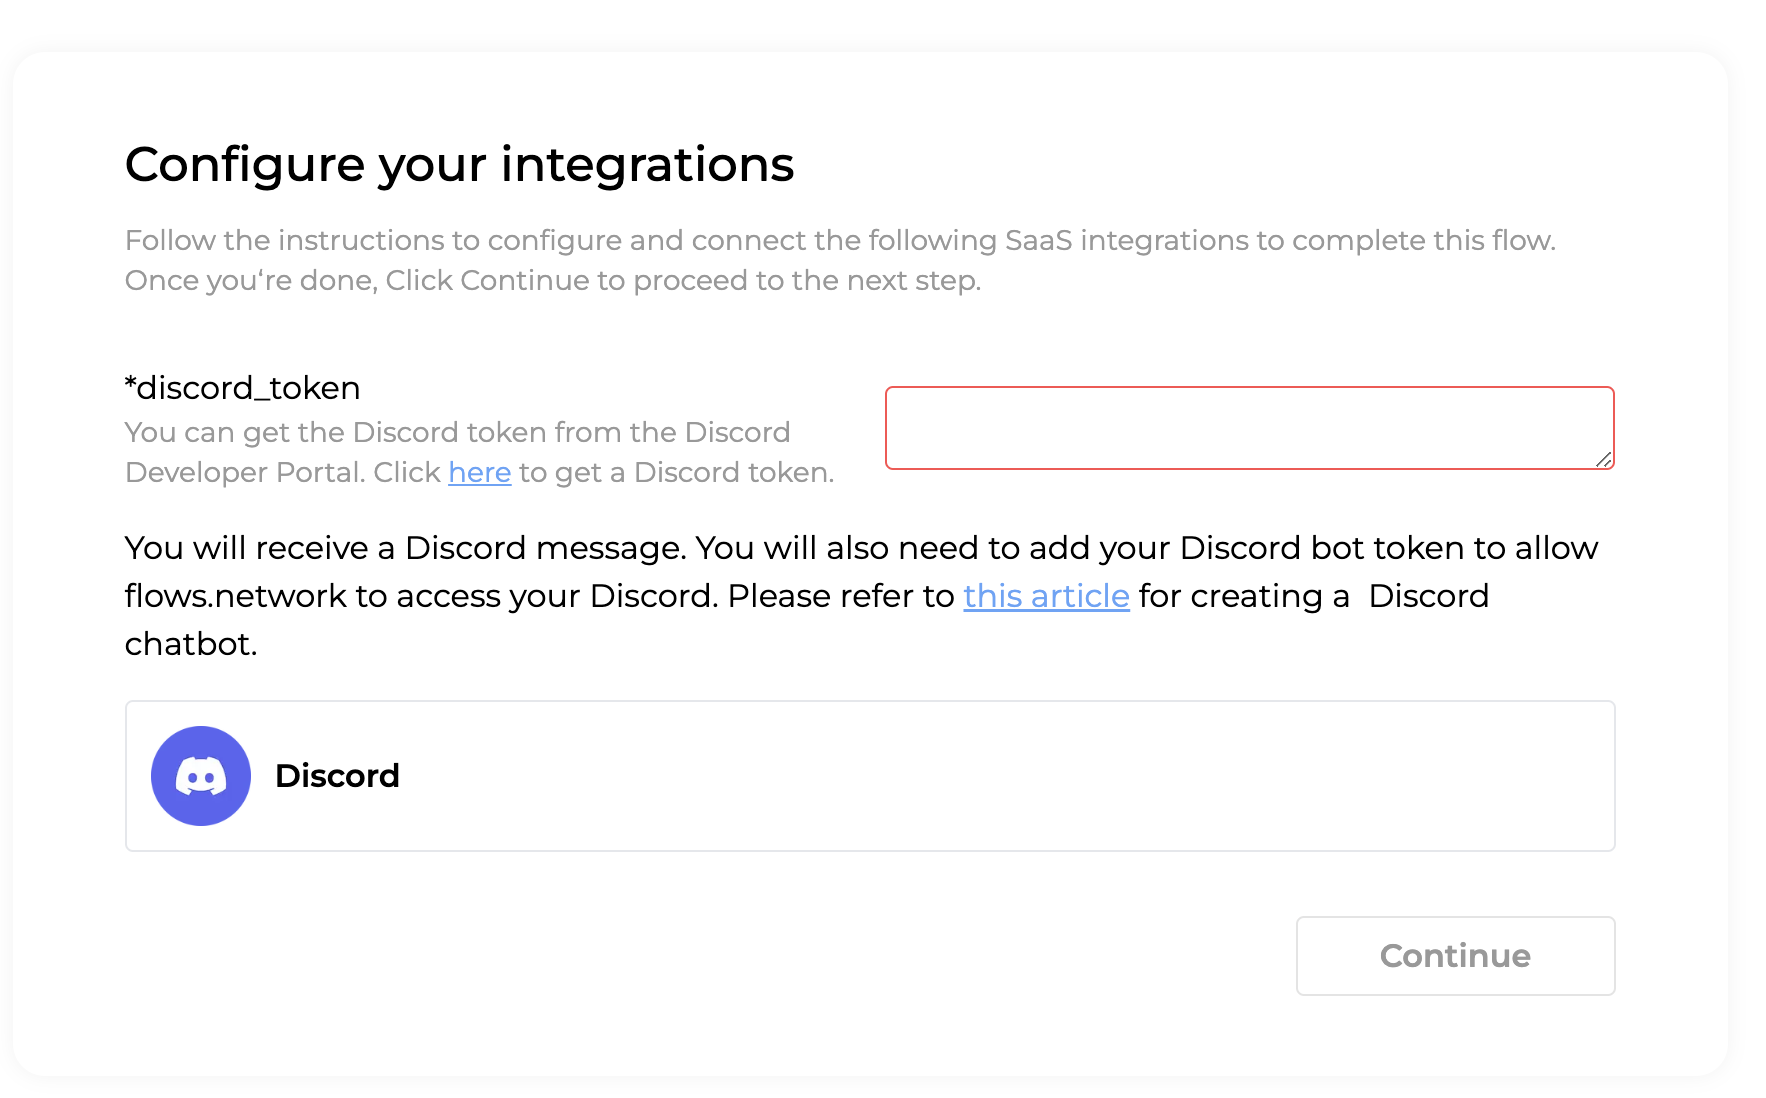
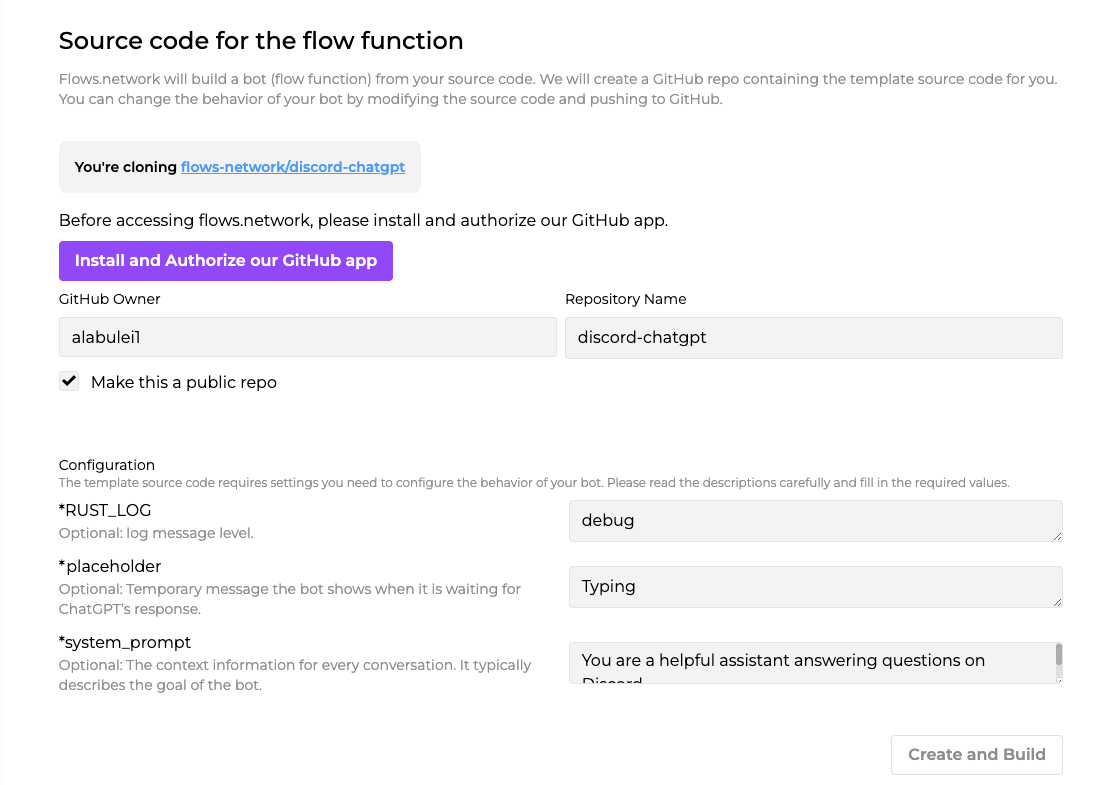
Click the purple Install and Authorize our GitHub app to grant flows.network to access your GitHub repo. After that, review the system_prompt. You can copy and paste prompts from here. The text you input here decides what the role of the chatbot.

Then, Click Create and Build to process.

3.2 Configure the Bot

Next, configure the integrations required by this flow template. It’s Discord and ChatGPT API keys.

Copy and paste your Discord token into the red rectangle. Then click the Continue button.

Next, let’s configure the ChatGPT API key.

Click on Connect, and you will be redirected to a new page where you can copy and paste your OpenAI key here.

Close the tab and go back to the flow.network page once you are done. Click on the Deploy button.

4. Test and Interact with the Bot

Once the status of the flow turns ready and running, go back to your Discord server and you can find the bot is online now. DM the bot and the bot will now answer your questions.

Conclusion

By following this step-by-step guide, you have learned how to build a ChatGPT Discord bot on flows.network, without any coding! flows.network provides a serverless platform to simplify the deployment process and allows you to focus on building engaging chat experiences for your Discord community. Have fun experimenting and building conversational experiences with your new bot!

Other templates using Discord

FAQs

Is flows.network a free platform?

flows.network is currently free to use.

Can I integrate other APIs with my flows.network bot?

Yes, flows.network allows you to integrate various SaaS APIs to enhance the functionality of your bot. You can connect to external services, databases, and other APIs as needed. Check out the Hacker-News-ChatGPT-Discord function, which access API for Hacker News.

What kind of customization options are available for the ChatGPT on flows.network?

flows.network provides configuration options: systerm_prompt to customize the behavior of the ChatGPT bot. And the bot's source code is available in the GitHub repo you cloned from the template. You can set the response length, retry times to guide the bot's behavior if you can change the source code.

Can I deploy multiple bots on flows.network?

Of course, you can deploy multiple bots on flows.network.

You can manually create a new flow and import the source code repo for the bot (i.e., the repo you cloned from the template). Then configure the OPENAI and Discord integrations accordingly.

You can have a single flow function repo deployed as the source code for multiple bots. When you update the source code in the repo, and push it to GitHub, it will change the behavior of all the bots.

· 2 min read

A Discord chat bot is a bot user that can receive and respond to private messages, as well as channel messages that specifically mention or reply to the bot user. In order to connect a flow function with a Discord chat bot, you will need a discord_token.

  1. Go to the Discord Developer Portal and log in.
  2. Click on the "New Application" button and give your bot a name.
  3. Next, on the application details page, you can update the app icon, description, tags etc.
  4. Click on the "Bot" tab on the left panel.
    1. Click the "Reset Token" button to get the discord_token. Write down the token and keep it safe!
    2. Turn on the "PRESENCE INTENT", "SERVER MEMBERS INTENT", and "MESSAGE CONTENT INTENT" settings.
  5. Click on the "OAuth" tab on the left panel
    1. Click on "URL Generator".
    2. Select the "bot" scope.
    3. Select the "administrator" permission (or select message reading and sending permissions individually as you need).
    4. Get the bot URL from the GENERATED URL in the bottom of this page.
  6. Finally, use the bot URL from the last step to invite the bot into any of your Discord servers.

Once you connect a flow function to the bot (via the discord_token), all users in the Discord server will be able to message the bot and mention / reply to it in channels.

· 3 min read

Discord is a great communication tool for the community. Lots of organizations, companies, and open-source projects use Discord as the home of their community. One of the most famous use cases is Midjounry. Lots of people use Midjourny to generate unbelievable images with the help of a Discord bot. In this article, I will show you how to create a Discord channel bot that can send and receive messages from an external service to a Discord channel. To connect a Discord channel on flows.network, you need two parameters: discord_channel_id and discord_token.

How to get the Discord channel id

Let's get started with channel id, which is much easier. Discord channel id is an 18-digit number.

Each channel has its own unique URL. A standard URL of a discord channel is made up of discord.com/channels/numbers/discord_id. All you need to do is to enter the channel where you want to deploy the bot and copy the last numbers of the URL.

https://discord.com/channels/846973236280950824/846973236280950827
|---channel id-----|

That's how we get the Discord channel id. You can use a Discord channel ID to indicate the channel from which the bot should exit.

How to get the Discord bot token

  1. Go to the Discord Developer Portal You need to log in your Discord account first.
  2. Click on the "New Application" button and give your bot a name.
  3. Then, you will be redirected to the application details page. On the general information page, you can update your app icon, description, tags and other stuff.
  4. Click on the "Bot" tab on the left-hand side of the page. In this page, we need to
    1. Click the Reset Token button to get the Discord bot token. Then save the token carefully, which we will use to build a flow on flows.network.
    2. Open the PRESENCE INTENT, SERVER MEMBERS INTENT, and MESSAGE CONTENT INTENT.
  5. Click on the "OAuth" tab on the left-hand side of the page and click on URL Generator.
    1. On the URL Generator page, select "bot" scope.
    2. Select the "administrator" permission (or select message reading and sending permissions individually as you need).
    3. Copy the bot URL from the GENERATED URL in the bottom of this page. This URL is used to invite your bot to your Discord server after your flow is running successfully.

After you get the Discord Chanel id and Discord bot token, go to flows.network to create a Discord bot, like the ChatGPT Discord server.

Connect the channel id and Discord token with your bot

The easiest way to create a discord bot is to get started with a pre-built template. Let's take the GitHub Issue Tracker template as an example. After you complete the first step: create and build the flow, you'll be redirected to a page where you need to configure the Discord settings. As you can see from the image below, we need to fill in the Discord channel id and Discord bot token.

When you finish all the steps and your flow turns running, you can invite the bot to your server by the bot URL you just got in the previous step.