
5 posts tagged with "integration-guide"

View All Tags

· 3 min read

Introduction

Telegram is a popular messaging platform that allows users to communicate with individuals or groups through chats. In some cases, you may need to find the Chat ID or Group Chat ID for your Telegram conversations. In this guide, we will walk you through the process of finding the Telegram Chat ID and Group Chat ID.

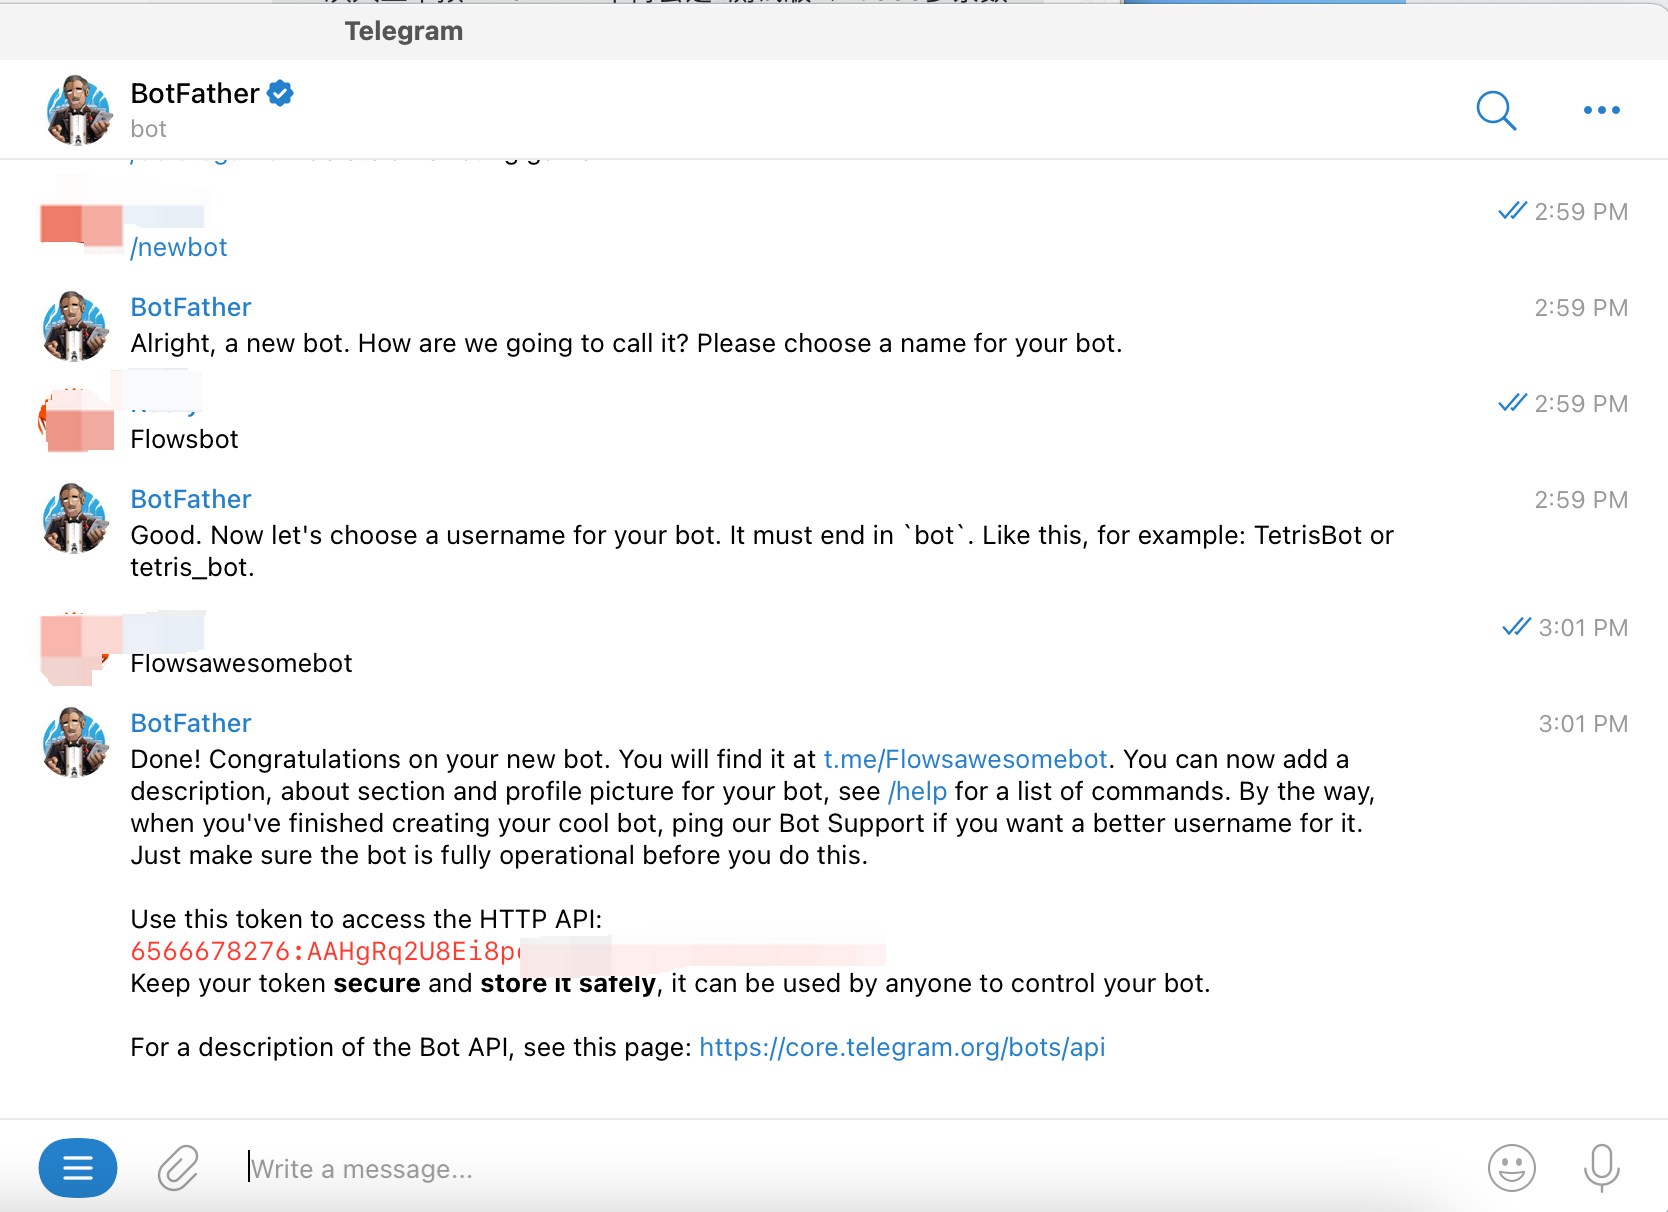
For a Telegram bot token, please check out How to get a Telegram bot token.

The chat ID and group chat ID is not easy to get. The official Telegram bot @botfather doesn’t provide any information about chat ID and group chat ID. However, the telegram bot ecosystem is prosperous. We can solve this problem with a bot called Get My ID. After trying several bots, I found this bot the easiest one.

Next, let’s learn some basic concepts. Telegram has three different kinds of chat IDs, one is for a telegram bot to send DM, which is simply called chat ID. The second one is for a telegram bot to send and reply to messages in a group, which is called group chat ID. The last one is for a telegram bot to send messages in a channel, which is called channel chat ID. The telegram channel is more complicated and we will cover this part in another independent article.

What’s the difference between a Telegram group and a channel? The Telegram group allows the members here to send and reply to messages from each other. While the Telegram channel is more like a notification system. Only the designated users can send messages in the channel. The subscriber of the channel only can read the messages or react the messages with emojis.

Despite their distinctions, all three types of ID are unified under the umbrella term chat_id in Telegram's API documentation. However, they assume distinct roles and are made up of different parameters. Therefore, it is crucial to specify the type of Telegram bot you intend to develop.

How to Find Your Telegram Chat ID

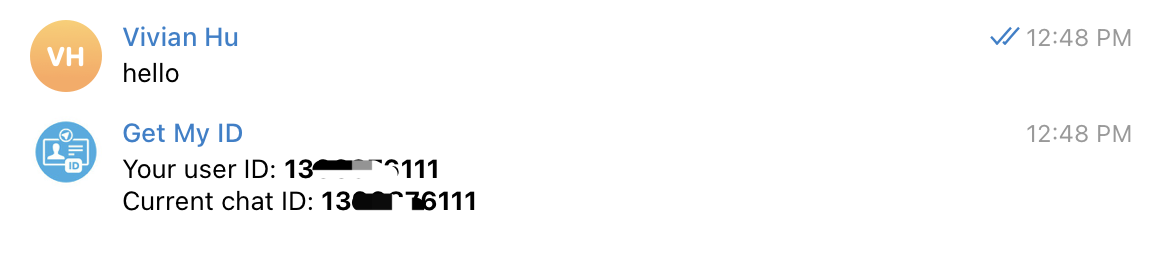
To obtain your chat ID, simply send a direct message to the Get My ID bot, and the bot will promptly respond with your user ID and Current chat ID. Both values are identical, so it matters not which one you choose to copy and paste. This ID is needed for a bot to interact via direct messages.

How to Find the Telegram Group ID

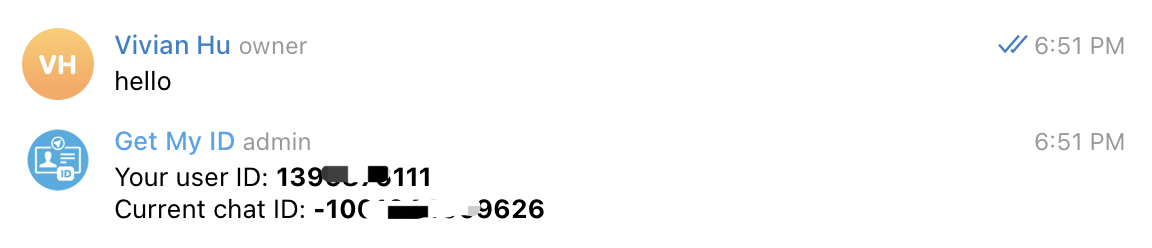
To get a group's chat ID, invite the Get My ID bot to the group. Once it joins, send a message in the group chat. The bot will respond with your user ID and Current chat ID. The Current Chat ID, starting with a hyphen (-), is the group chat ID. Note that if the Get My ID bot is present in multiple groups, the “Current chat ID” will alter accordingly. Therefore, exercise caution to ensure that you invite the Get My ID bot to the intended group.

In summary, message the Get My ID bot for your personal chat ID, and invite it to a group for the group chat ID. We will introduce how to get a channel in the next article. Please stay tuned!

Next, you can build a Telegram bot to summarize and send the Hacker News Post that you're interested in.

· 3 min read

When you use a pre-build template with Airtable, configure these 3 parameters: airtable_table_name, airtable_base_id and airtable_token_name. And you also need to grant flows.network to access your Airtable via the API token provided by Airtable.

NameValueRemark
airtable_table_nameA string of alphabets begins with tbthe name of the table you want to add data, which you can find on Airtable.
airtable_base_idA string of alphabets begins with appthe base id to which the table you wish to add or retrieve data belongs, which you can find on Airtable.
airtable_token_nameA string of word (s)the name of the Airtable API token, which is defined by you.

In this article, I will show you how to configure these parameters to make your flow work.

Create a flow from a template

flows.network will give you the UI instruction when creating a flow from a template.

Configure airtable_table_name, airtable_base_id and airtable_token_name

Generally, you can see the following image.

On the top of the section, you need to enter airtable_table_name, airtable_base_id and airtable_token_name. As I mentioned before, airtable_table_name and airtable_base_id tell flows.network where to add or read data.

So the first step is to go to your Airtable base and get the current URL.

https://airtable.com/appNEswczILgUsxML/tblyMHEVEkFkHM7Z1/viwdHLVHdR603VNlL?blocks=hide

|----base_id-----| |----table_name--|

The base_id is begun with app and the table_name is begun with tb. Copy and paste the two parameters.

The last one is airtable_token_name. Here you can name your API token.

Add your Airtable API token

After typing these parameters, click the purple Connect button to add your Airtable API token. Then you will be redirected to a new page.

Give your Airtable API token a name, which should match the airtable_token_name you set earlier. Then copy and paste your token here. After that, click on the Continue button and you will be redirected to the Airtable integration page, and the token you added will be popped into this page. Then close this tab and go back to the Creating a Flow page to finish the flow. Once you connect successfully, you won’t do it again when you create another flow.

Or you can also add your Airtable token before creating a flow. Once you finish this, you don’t need to connect it again when you're creating a flow.

After you sign in flows.network, go to the Airtable integration page and click on Connect button. Then you will be redirected to a new page.

We need to name your Airtable API token and copy and paste your token here. After that, click the Continue button, and you will be redirected to the Airtable integration page, and the token you just added will be popped on this page.

That’s it. Remember your Airtable API token name because you will use the name when you create a flow.

· 2 min read

A Discord chat bot is a bot user that can receive and respond to private messages, as well as channel messages that specifically mention or reply to the bot user. In order to connect a flow function with a Discord chat bot, you will need a discord_token.

  1. Go to the Discord Developer Portal and log in.
  2. Click on the "New Application" button and give your bot a name.
  3. Next, on the application details page, you can update the app icon, description, tags etc.
  4. Click on the "Bot" tab on the left panel.
    1. Click the "Reset Token" button to get the discord_token. Write down the token and keep it safe!
    2. Turn on the "PRESENCE INTENT", "SERVER MEMBERS INTENT", and "MESSAGE CONTENT INTENT" settings.
  5. Click on the "OAuth" tab on the left panel
    1. Click on "URL Generator".
    2. Select the "bot" scope.
    3. Select the "administrator" permission (or select message reading and sending permissions individually as you need).
    4. Get the bot URL from the GENERATED URL in the bottom of this page.
  6. Finally, use the bot URL from the last step to invite the bot into any of your Discord servers.

Once you connect a flow function to the bot (via the discord_token), all users in the Discord server will be able to message the bot and mention / reply to it in channels.

· 3 min read

Discord is a great communication tool for the community. Lots of organizations, companies, and open-source projects use Discord as the home of their community. One of the most famous use cases is Midjounry. Lots of people use Midjourny to generate unbelievable images with the help of a Discord bot. In this article, I will show you how to create a Discord channel bot that can send and receive messages from an external service to a Discord channel. To connect a Discord channel on flows.network, you need two parameters: discord_channel_id and discord_token.

How to get the Discord channel id

Let's get started with channel id, which is much easier. Discord channel id is an 18-digit number.

Each channel has its own unique URL. A standard URL of a discord channel is made up of discord.com/channels/numbers/discord_id. All you need to do is to enter the channel where you want to deploy the bot and copy the last numbers of the URL.

https://discord.com/channels/846973236280950824/846973236280950827
|---channel id-----|

That's how we get the Discord channel id. You can use a Discord channel ID to indicate the channel from which the bot should exit.

How to get the Discord bot token

  1. Go to the Discord Developer Portal You need to log in your Discord account first.
  2. Click on the "New Application" button and give your bot a name.
  3. Then, you will be redirected to the application details page. On the general information page, you can update your app icon, description, tags and other stuff.
  4. Click on the "Bot" tab on the left-hand side of the page. In this page, we need to
    1. Click the Reset Token button to get the Discord bot token. Then save the token carefully, which we will use to build a flow on flows.network.
    2. Open the PRESENCE INTENT, SERVER MEMBERS INTENT, and MESSAGE CONTENT INTENT.
  5. Click on the "OAuth" tab on the left-hand side of the page and click on URL Generator.
    1. On the URL Generator page, select "bot" scope.
    2. Select the "administrator" permission (or select message reading and sending permissions individually as you need).
    3. Copy the bot URL from the GENERATED URL in the bottom of this page. This URL is used to invite your bot to your Discord server after your flow is running successfully.

After you get the Discord Chanel id and Discord bot token, go to flows.network to create a Discord bot, like the ChatGPT Discord server.

Connect the channel id and Discord token with your bot

The easiest way to create a discord bot is to get started with a pre-built template. Let's take the GitHub Issue Tracker template as an example. After you complete the first step: create and build the flow, you'll be redirected to a page where you need to configure the Discord settings. As you can see from the image below, we need to fill in the Discord channel id and Discord bot token.

When you finish all the steps and your flow turns running, you can invite the bot to your server by the bot URL you just got in the previous step.

· 2 min read

To build Telegram bots or automate Telegram-related workflows on the flows.network platform, a Telegram bot token is necessary. flows.network supports Telegram integration, which enables you to create Telegram bots with ease.

Here's a step-by-step guide on how to get a bot token for Telegram. Then you can use this token to create your own telegram bot.

  1. Open Telegram on your device or web browser and search for the "BotFather" account @BotFather.
  2. Start a chat with the BotFather and type "/newbot" to create a new bot. BotFather will ask for a name and username for your bot.
  3. Choose a name and username for your bot. The name can be anything you like but the username must end with "bot". For example, the name can be "FlowsNetworkBot" and the username can be "@flowsnetworkbot".
  4. If your chosen username is available, BotFather will provide you with a unique API token for your bot. You should copy and store this token carefully.
  5. Once you have the API token, you can start building your Telegram bot on flows.network. Here is a template project to build a ChatGPT-powered Telegram bot on flows.network.

Note that the API token is a unique identifier for your bot, which allows you to send requests to the Telegram Bot API. Make sure to keep this token safe and secure, as anyone with access to this token can potentially control your bot.

In conclusion, getting a bot token for Telegram is a simple process that can be completed with BotFather's help. Once you have the token, you can start building your bot on flows.network.

Next step is to read the telegram-gpt repo and follow the instructions to build your own chatgpt bot.